Guide stick construction
Indice
Construction of a guide stick
To build a guide stick you need:
- 1 wooden batten (preferably spruce) of the following dimensions: 10 * 95 * 1000mm ( you can also use a 10 * 70 * 1000mm if you don't find the correct width ). In other words, a wooden board as wide as a PC keyboard and 1cm thick ...;
- 1 wooden batten (preferably spruce) of the following dimensions: 10 * 40 * 2000 mm;
- White electrical tape (or whatever color you prefer);
- 2 screws up to 10mm long or nails;
- 1 pencil;
- 100 and 350 grit sandpaper;
In case you want to do everything yourself without the help of a carpenter then you will need the following tools:
- a wood rasp;
- a hacksaw;
- a screwdriver;
- a file for metal;
- various glues: cyanoacrylate and / or Vinavil.
You can find the two strips easily, by going to woodworking centers, hypermarkets that dedicate their own section to DIY or by asking a carpenter. The plastic rib / back can be purchased at any stationery shop.
Construction process
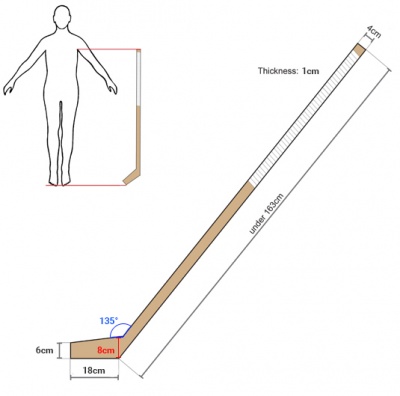
Draw on the first strip (the one that measures 10 * 95 * 1000 mm) the blade according to these measures:
The measurements shown are sufficiently indicative, this means that you could vary these measurements by a maximum of 5mm. The internal angle between the headstock and the shaft is 135 °.
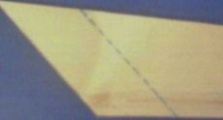
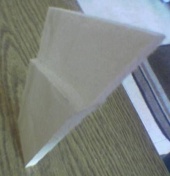
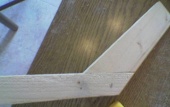
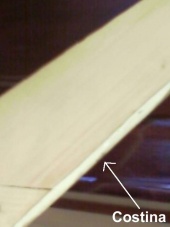
The dotted part in the first 2 photos on the right indicates the point where the second strip will be positioned, which will act as a guide rod rod. More precisely, the part delimited by the hatch will be leveled in order to create a "step" a little less than half the height of the strip itself. This procedure will also be applied to the second batten.
Go to your trusted carpenter (you will have to entrust the most delicate work to him) and let him cut the strip according to your design. Alternatively, buy a rasp, a hacksaw and do the following work yourself: cut the first strip with the hacksaw following the design of the blade. Then use the rasp on the blade just obtained: "buff" following and not exceeding the dotted line, until you create a 5mm deep groove (ie half the thickness of the blade).
Processing of the second strip
After completing the blade, the work to be carried out will be relatively simple: you will have to level the second strip (the one that measures 10 * 40 * 2000 mm) creating a 5mm deep step. Remember that the part to be leveled of the second strip must cover the whole leveled part of the first, do not mind the fact that the step of the second strip will come out of the blade because the excess will be removed later. To carry out this work, place one end of the second strip on the leveled part of the first strip, then use a pencil, marking two lines on the second strip corresponding to the contact points between the first and second strip. These lines will show you where to level the second batten. Use the rasp again (or leave it to the carpenter), this time "rasping "the part that you marked out with the pencil on the first strip.
Assembly and final processes
Once the blade and rod have been obtained, these will be fixed together, for this purpose you will have to use 2 screws not too long (1 cm max, or nails) which will be screwed one on the second strip and one on the first. The strips must obviously be superimposed. If the screws are too long, you can still level them with a metal file. To fix the screws, all you have to do is screw them in the points you have chosen, the first screw will start from the blade and penetrate into the second strip, the second will start from the second strip and enter the blade.
Cut off the second strip in excess: first saw off the excess part of the second strip that protrudes from the blade. Then get up, hold the stick and the pencil, place the stick in front of you and mark with the pencil the point of the shaft corresponding to the height of your armpit: the length of the guide stick should relatively correspond to your height. Then draw a horizontal line on the second strip at your chin and saw the stick following this line.
After composing the guide stick it will be sufficient to eliminate the impurities of the wood by sanding the entire stick with sandpaper 100. Smooth the corners of the strip that you will use as a handle (1/2 of the strip starting from its end and proceeding towards the blade) with a thick grit sandpaper. Apply a coat of 350 sandpaper.
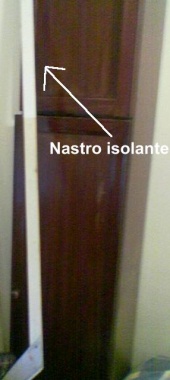
After carrying out this finishing process you will need to use white electrical tape wrapping half of the rod with it , starting from the top end that you saw earlier.
Once the blade has been assembled (add the Vinavil between the parts to be joined) and finished everything, it will be necessary to use the rasp and file the lower end of the blade that will touch the ground while driving: in practice this side of the blade will have to take a round shape or at an edge (while driving, at the moment of a curve the stick tends to incline and therefore a similar shape facilitates this behavior).
Finally, you can reduce the adhesion of the part of the blade that will touch the ground by mounting a round backplate in plastic or other low-adherence material such as nylon or delrin under the blade.
If you have followed the processes described so far then your guide stick will be ready. It is important that your guide stick does not weigh more than 250gr / 275gr, if it weighs more it could make your driving very tiring and give you wrist problems, so pay attention to the weight!
Sommario
| Storia |
| Generale |
| Tecnica
Guida · Pneumatici · Pile · Motori · Meccanica · Assetto · Telai · Fisica · Sospensioni · Materiali plastici · Stampa 3D |
| Tutorial |
| Gare |
| Contatti |

